Go-To Tuesday

Do you ever just have one of those days when you get home from work, school, or just a long exhausting day and want to chill and watch something on Netflix? Then you open up the app just to see millions of different options of what you can watch. Well I’m here to help you with what to choose next. I don’t know about you, but I’m all about watching shows that are funny and put me in a good mood, especially if it’s before I go to bed. I don’t like to watch anything too dark or serious, just lighthearted and fun. Which is why “The Office” has been my go-to show to stream for a couple years now. I can’t suggest this show enough to people. Those you that have already watched the show and are fans will attest to this, it’s AMAZING! Such a great show with stupid humor that you can’t help but laugh at. The best part about this show is that I’ve watched all of the episodes multiple times and still laugh at new things I never caught before that. My one piece of advice I give to all the people I suggest the show to is to make sure you give season 1 a chance. It’s rough starting and if it doesn’t seem interesting enough for you, then just skip to Season 2, Episode 1 (trust me, that’s when it gets good). So make sure you check out “The Office” and don’t be intimidated by the many seasons, once you get started you’re gonna wish there was more!

Hello Friends,

Top of the mornin’ to ya and Happy St. Patrick’s Day! Today’s blog post is something a little festive for this lucky holiday. So if you’re going to the parade, bar hopping, or celebrating with family this look is super cute, easy, and festive for any occasion. So let’s get to it:

When it comes to an eye look with brighter colors, I always like to start with my eyeshadow first. I included the video below to see how I applied the eye makeup exactly. Underneath the video I will have a breakdown with pictures and how to achieve this look from beginning to end.

  1. To start off the look, I always prime my eyes with Urban Decay Primer Potion to help keep the shadow stay intact.
  2. Then I went in with the color Anaheim from the Gwen Stefani Urban Decay palette that I’ve owned for a few years now. The color is comparable to a desert taupe. I applied this color to the crease of my lid. I used a blending brush to help apply the shadow into my crease with a curved sliding motion going side to side.
  3. The second color I went in with, the main event, was the bright Kelly Green called fins (from a mermaid palette I’ve also owned for years). This color was the perfect shamrock green that I was looking for (below I’ll attached some palettes that are newer that have comparable colors for this makeup look). I went in with an Eyeshadow brush and dabbed the Kelly Green onto my inner lip to the middle of my eyelid.
  4. Next, I used a black eyeshadow with gold flecks throughout it, called Cinders, for my outer corner. I used another eyeshadow brush to dab this black eyeshadow delicately onto my lid. You must be very gentle with how much product you place onto your brush because a little bit of black always goes a long way. You also need to make sure you blend blend and blend.
  5. After you apply that black eyeshadow, it’s best to go back with the first color we applied (Desert Taupe) and just go over the crease again. This will help blend the black, green, and desert taupe all together.
  6. My last step to my eyeshadow look is the brow bone highlight. I went in with a light shimmer cream color, like Seashell shown below.
  7. Once I finished my eyeshadow color, I grabbed my Green eyeliner (the same green eyeshadow can be used under the eyes if you don’t own liner) and smudged it on my bottom lash line. After that I went in with my NYX Makeup Wonder Pencil on my lower waterline.
  8. Moving onto my top lash line, I grabbed my favorite liner which is the Maybelline Line Stiletto Eyeliner. I created a cat eyed liner for this look.
  9. Moving onto my favorite part, the fake eyelashes by Kiss. I apply these with Ardell Lash Adhesive which has made my process of putting them on so much easier!
  10. Once my eyelook has been accomplished, I follow my basic makeup routine I’ve featured before (Click the hyperlink to be taken to that page). My only difference is I finish it off with Maybelline Super Stay Matte Ink Lip Color in the color Ruler.

And that’s it! Here’s the finished look:

Below, I’ve attached makeup palettes that are available for purchase with the same colors used to achieve this look:

BEST PALETTE TO ACHIEVE THIS WHOLE LOOK!:

Tartiest Pro Remix Palette (Wall Art, Color Explosion, Best Drop, Flow)

Others:

Huda Beauty Obsessions Eyeshadow Palette (Emerald)

Morphe x Jaclyn Hill The Vault Armed & Gorgeous Eyeshadow Palette

I hope you all have a wonderful weekend, the best of luck, and find the pot of gold at the end of the rainbow!

Go-To Tuesday

Anybody else have an obsession with any type of spa mask? Face, lips, under eyes, you name it and I’m obsessed with them. So when I came across this lip mask online I knew I needed it! It’s called Laneige Special Care Lip Sleeping Mask in the flavor Berry. The box instructs you to use the applicator (included in box) to apply all over lips until fully coated. I noticed the more I put on, the better the result. Then you just go to bed and once you wake, you wipe off the excess. And that’s it! I’ve noticed that my lips the next morning are super hydrated and I love the way it makes them feel. If you struggle with dry lips then this is the overnight trick to fix them. It makes them silky smooth and it’s my favorite lip moisturizing product, next to my go-to lip balm. Make sure you check out this product on Sephora (I linked the photo above to take you to the product online).

Hey friends,

Welcome back to my blog! Today, I wanted to share some of my newer purchases from Target. I explored the sale section and the Wild Fable clothing line section and found some amazing deals. First of all, the Wild Fable collection is a relatively newer clothing line within the Target Style Department. I like to think of it as the Forever 21 of Target’s Women/Juniors/Plus clothing department. Why is that great? I like it because you can buy trendy pieces cheaper and not have to worry about not wearing it in a year cause you only spent $20 on it. I also like it because you can get a lot for a little, who can argue with that? Not me! So below, check out some of the pieces I purchased and I’ll link them (if available online) or I’ll share the price that I purchased it for in the store. Here we go:

Wild Fable Red Spaghetti Strap Dress: Original price $18.00, Sale price that I received $5.40. Unfortunately it is no longer available online but I did see multiple at different target store locations in my area so definitely take a look in stores if you’re interested.

Wild Fable Cropped Denim Jacket: Original price $30.00, Sale price that I received $9.00. Unfortunately this one is also no longer available online but one of my best friends just purchased it recently so definitely take a look in stores if you’re interested.

Wild Fable Off the Shoulder Long Sleeve & Wild Fable High Rise Skinny Jeans : Both of these are still available online and I linked them above. Just click the hyperlink to the product you wish to see. Both great prices and I absolutely LOVE these jeans. Super comfy, stretchy, and I love where they high rise hits my body.

Wild Fable Smocked Off the Shoulder Purple Floral Top: Original Price $20.00, Sale Price that I purchased it for $5.40. Again, this one is also no longer available online, which is a shame because it’s gorgeous on! BUT again, check out your local targets and search their sale racks in your size. You may get lucky and find this great piece.

Wild Fable Black Denim Mini Skirt: This is not the same exact skirt that I have on but this is a great price so I figured I’d include it in the haul.

Wild Fable Square Neck White Long Sleeved Tee & Wild Fable Faux Suede Button Front Skirt : This is my favorite outfit I’ve purchased from them so far. This tee is super comfy, cropped slightly but fits like a glove. The skirt has an elastic band on the back which makes it super easy to put on. No worries about squeezing into a zipped up skirt here. Can I get an Amen? Haha

Well friends, that’s it for my Target’s Wild Fable haul. I hope you all enjoyed this and let me know if you’d like to see more posts like this.

Hey all,

I have some great products to share with you on this wonderful Friday! I don’t know about you, but I always find myself with 20 tabs open on my internet browser with things I want but don’t need. I think we all have those impulse buy days where we just decide to treat ourselves (I know I do haha). With that being said, I figured I could make a blog post out of it and share with you all my Five Fabulous Finds for this week. So without future ado, here they are:

1.) Meltdown– Currently, my skin has been crappy, so when I came across this product I was instantly intrigued. I think out of this list of my finds this week this is the most essential to me. Not so much of an “I want” product but more like a “I want and kind of need too” type.

2.) Pink Letter Board– Recently, these cute and fun looking boards are all the rage. People use them as decorations for their house, bedroom, events, parties, etc. I think this is so adorable, plus it’s pink, which is my favorite. This is so cute to add to your decor to spice it up a bit, plus it’s customizable! Also guys, it’s super affordable, win-win in my book.

3.) Tarte’s High Tides and Good Vibes Palette– I’m a big tarte lover, if you couldn’t tell by my basic makeup routine. I love their products and this palette is no different. I think this new addition is gorgeous and the pigment from the glitter shadows looks insane! This palette is going to be great for summer with all these vivid colors. Definitely worth a look!

4.) Bath Tub/Bed Tray– So I came across this Instagram blogger from Germany a week ago and she had the cutest picture at the top of her feed. It was her in the bath tub with a tray sitting on top with some of her favorite things. I was intrigued and got stuck scrolling through amazon for a similar tray. Unfortunately, my bath tub can’t support these types of tray (so dream ruined haha) but maybe my future home will have a better bathtub (fingers crossed). With that being said, I came across this tray and thought it would be amazing for me currently because not only is it a bath tub tray but you can also use it on your bed, couch, automan, bench, etc. I thought that was so cool and had to include it on this list.

5.) F87 Edge Kabuki– I know what a lot of you are thinking, what the heck is that? Well for starters, it’s a makeup brush. What else does it do? It applies foundation, concealer, and powder to hard to reach creases. Why do I have it on this list? Great question! I follow two beauty bloggers on Instagram (@exteriorglam & @annalovesyou) and they both highly suggest this brush for “baking” their concealer. I’ve watched them apply their powder with this brush by dabbing it into the powder then dabbing across the undereyes, forehead, and jawline (under contour). Needless to say, they made the process look seamless and it’s been sitting in my browser purgatory ever since.

And that’s it for this week’s edition of Katey’s Five Fabulous Finds on Friday! Let me know in the comments below if you own any of these products, plan to buy any of these, and/or how you feel about them. Thanks for reading all!

Go-To Tuesday

About a year ago, I was walking through Marshall’s and I found this mirror. Not just any mirror but the Impression Touch 2.0 LED Mirror. What’s so great about it? Well for starters, it has a touch button on the bottom center that turns on 22 little LED lights to help illuminate your face. Second, it’s small enough and adjustable to easily throw in your weekend bag or suitcase to use when traveling. Lastly, the ‘on’ button can also dim the lights just by holding it in after turning it on. It’s a super handy mirror. I love this mirror and love the other options the brand, Impressions Vanity Co, offers on their website. Some of the mirrors on the site get on the pricier end but if you’re lucky you can find the Touch 2.0 at Marshall’s and TJ-Maxx for only $15-$20. These mirrors are definitely worth it though if you travel a lot and struggle with finding mirror space on your trips. Make sure you check these out, it’s worth a peruse and you’ll understand why it’s one of my go-tos. (Click the picture above and it will take you right to their website for this product!)

Well hello again,

If you’re anything like me, I bet you have a sh*t ton of makeup and only use about half of it. Sound about right? I thought so because up until a year ago, I did the same thing. What changed? Well, my organization changed.

About a year ago, I was irritated when applying my makeup because I couldn’t find my eyeliner in my makeup bag. I shuffled through it about 10 times and no such luck. My best friend was waiting outside for me and I still needed to put on eyeliner and mascara but couldn’t find it in Vera Bradley makeup bag. I decided that I was over keeping my makeup in either my makeup bag or a plastic bin and decided to invest in a makeup organizer. What is a makeup organizer? (Click the hyperlinked ‘makeup organizer’ to see an example of the product.) Now, this is just one example of an organizer. If you search google or amazon, you will find a larger variety. The one I attached above is one of the organizers I own. I decided that I could place all my makeup that I used on a daily basis in the organizer, that way I had them all sitting out in front of me and could find what I needed fast and efficiently. After purchasing the first organizer, I realized that it helped quicken my makeup routine by 15 minutes. That’s right, 15 freaking minutes! You think I’m joking but it seriously saved me so much time. I also noticed that I started using full bottles of products versus forgetting about them, finding them 2 years later that leaves me to have to throw them away when I barely even used them. So not only did the organizers save me time, but they also saved me money. Crazy right? So after owning that first one for about 6 months, I was given an additional organizer for my birthday. Oh boy, you wouldn’t believe how excited I was to get home and to start reorganizing my makeup. My older organizer was beginning to get cluttered from lots of newer makeup I had purchased and I started using the old plastic bin again. But no more, once I brought this new present home, I cleared off my sink and placed this new organizer on the opposite corner to my sink. See picture below:

Full View of Makeup Organizers

1st Organizer: Top Portion (Left—I’ll relink it to the picture)

Liquid Lipsticks Holder (Right— it’s actually a pencil holder)

1st Organizer: Bottom Portion (Also linked to the picture)

2nd Organizer: This one was given to me as a gift and I can’t find it anywhere online. So I linked a similar one to the photo. It doesn’t have the drawers but it has a lot of portions to it.

Brush Organizer (linked to photo), this was also a gift and a little pricier. I did find some on amazon that were a lot cheaper and looked pretty similar. I’d check out amazon if you don’t want to spend $50 on this. I have had this for years (and you can tell haha) but it holds a lot. You can’t tell from the photo, but the right side is a zipper pocket and it holds a good bit too.

Now that I have all these organizers, I went back through my makeup and put similar products together. Honestly, it’s a game changer. If you’re someone with a growing makeup collection and not much place to put it, I definitely suggest investing in these organizers. These will save you time and money, and who can argue with that? I know I can’t! Let me know if you own a Organizer and how you feel about it? Or if this has inspired you to buy one. I’d love to hear how you all feel. Until next time..

Welcome back everybody,

If you’ve been following along with my blog, I mentioned that I have grown a passion for makeup through the last couple years. I do not consider myself a makeup artist by any means but I’d like to think I have learned A LOT from some of my favorite makeup vloggers on Instagram. My two favorites are @exteriorglam and @annalovesyou, if you don’t follow them you need to check them out! Anyway, I wanted to be able to give you guys basic tutorials, suggestions on products and my favs, techniques I use, and more. Today, I wanted to focus on my basic makeup routine. Basically, I wanted to break down my process of how I do my makeup and what I use. So here we goooo…

What I Use:

Primer – Before I used this primer my makeup would be all over my face or completely gone by the end of the night but no more. Now my makeup stays all night!

Foundation (In Soft Beige)- Seriously, this foundation is the real deal. I just started using it but it’s by far the best I’ve used in a while AND (you won’t believe me after I tell you this) it’s ONLY $5!!! Yes, five dollars, that’s it. So I know what you’re thinking, there’s no way it’s that good for that cheap but let me tell you, it is. If you’re someone that goes through a lot of foundation, I highly suggest this. If you’re someone in search of a new foundation, I highly suggest this. If you’re someone who is sick of paying $30 for foundation, I highly suggest this. If you’re someone who uses foundation, I highly suggest this. You catching what I’m throwing? Haha I sure hope so!

Foundation Brush – I know for years I struggled with finding a way to apply my foundation and to be happy with the result. I can finally say, I have found it with this brush, thanks to my favorite insta vloggers! If you have this same struggle, I definitely suggest this brush. It’s a little pricy but so worth it.

Concealer (33N Medium)- Yes, I know it’s not shape tape but it’s the next best thing AND you can buy it for a great price when they have big sales unlike shape tape which never goes on sale.

Contour (Medium)- Love this stick, especially for the contour portion. Plus, it’s a great price. Shoutout to my best friend, Kelsey, for suggesting this to me.

Beauty Blending Sponge – This isn’t the exact sponge I use but any type of beauty blending sponge is a go to for me when I’m tending to my concealer and contour.

Loose Powder – No lie, I buy this at the dollar general. It’s cheap and does the job so I’m all about it.

Brow Pencil (brunette)- Decent price for a decent product. I love that it comes with the brow wand at the end to help comb them after you apply the gel.

Brow Filler (medium brown)- This product is called busy gal brows for a reason and a good one at that. So happy I bought this because it literally shortens my makeup routine by like 5 minutes. This product is awesome and super easy to use.

Brow Gel -Need help keeping those brows in place but don’t want to spend a lot? This product is your new friend. Also, if you’re an Amazon user, they have this product on prime!

Eyeshadow Primer – A little pricier but it does the trick. It’s worth the extra bit.

Blush & Highlighter – So this is not the same exact blush palette BUT it has a lot of similar blush colors & a gold highlighter just like the BATB one.

Eyeshadow – I have many eyeshadow palettes that I love and use a lot but I always seem to keep picking this one up for a few reasons. The pigmentation is incredible and it’s so easy to apply. All you need to do is dip your finger in the product and swipe it on the desired area, it’s that simple. The colors are also beautiful and right up my alley.

Mascara Primer – When I’m not applying fake eyelashes, this is my way to make my lashes full. Gotta love a good mascara primer!

Eyeliner – I love the felt tip this product has. I’m not amazing at putting liquid eyeliner on but this eyeliner has been my introduction into them and now I’m hooked.

Mascara – I’ve followed a gal that suggested this product so I tried it and have loved it ever since. I’ve used some other more expensive mascaras and I haven’t noticed a difference between them. So with that being said, I might as well save some money and use the cheaper one. 💁🏻‍♀️

Setting Spray – This is a pricy setting spray BUT mine has lasted me a long time, like a year, and works very well. Definitely worth it.

Liquid Lipstick (I Woke Up Like This)- This is my go-to lip color, I absolutely love this color in any situation. It’s an all around great day/night color. Highly recommend!

My Process:

  1. Apply NYX HD Studio Photogenic Primer Base all over my face.
    Go in with Wet n Wild Photo Focus Foundation in Soft Beige and apply all over face. Use the Sigma F80 brush to smooth it all over face and neck.
    Once blended, apply Tarte’s Creaseless Concealer under the eyes, down the bridge of the nose, in between eyebrows and feathered up towards forehead. Also, apply the Hard Candy Contour stick (darker side) underneath cheekbone, jawline, underneath bottom lip, under the tip of your nose, and below your hairline on forehead.
    Use beauty blending sponge to blend it all out. How? Take your sponge and squeeze it under water so it can absorb it. Then squeeze it out before you begin to blend out the product. I personally like to blend out the contour first then go back to the concealer/highlight and then blend that out second.
    Once it’s all blended, open up your Covergirl Pro Loose Powder and dip your beauty blending sponge into the powder. Apply that powder (and have a good bit of it on there) under your eyes where you placed your concealer. If you can see the powder sitting there then you put enough on, if not go back and place some more on there. This technique is called baking and we’re going to leave this loose powder on for a little bit. Also use the excess powder left on your sponge and continue dabbing it all over your face. Basically you want powder on all the places we concealed/highlighted.
    Now we move to brows while we let our concealed eyes “bake”. Take your NYX Micro Brow Pencil and lightly outline the shape of your brows.
    Next, take your Tarte’s Busy Gal Brows and fill in the rest of your eyebrows with the product. Use as much as you desire. I like a more natural look but some people like the darken their brows up more, do what pleases you.
    Lastly, we take the Ardell Brow Sculpting Gel and lightly brush over our brows to apply the product. I only brush over it once because that’s more than enough product. Then grab the brush included in the NYX Micro Brow Pencil and smooth the rest of the gel throughout your brows. A lot of people go back through with concealer to make their brows look more precise but I don’t always think that’s necessary. If I’m not happy with my brows that day, I usually apply the concealer and that does the trick. If you need to do this, all you have to do is apply the concealer above and below your brows then use your sponge to blend out.
    What’s next? Eyeshadow! But first, we prime those eyes with Urban Decay’s Eyeshadow Primer Potion. Just swipe on your eye lids and spread it across desired area.
    While I wait for my Primer potion to dry, I brush off that excess loose powder and blend it into my face. I grab a blush brush and use a pink color from my Lorac Blush Palette. I also go in with the gold highlighter and swipe it down my nose, on cheekbones, and on my Cupid’s bow.
    Now we grab the Tarte Rainforest of the Sea Sizzle Palette and apply “paddleboard” to the crease of my eyes. Next, we use “off duty” and place it on the outer corners of our eyes. Lastly, I go in with “snorkel” and start from my inner corner blending it out with my finger towards the center. All of those colors should blend in towards each other in the center.
    Once my eyeshadow is on, I move onto Mabelline Stiletto Precision Eyeliner and wing it out on my upper lash line.
    Then I like to move onto my eyelashes, applying Covergirl Amplify Mascara Primer to the lashes. Once I’ve applied that to my top and bottom lashes, I then grab my Mabelline Sensational Mascara and apply that over my top and bottom lashes too.
    Once my mascara has been applied, I go back to my Covergirl Pro Loose Powder and reapply to my face on the places that feel dewy still. Then I grab my Urban Decay Setting Spray and spray it about 4 times across my face. I try to keep it about a foot away from my face so I just get a light mist to my face.
    Lastly, I grab my NYX Slip Tease Lip Oil and apply it to my lips.

And, that’s it! I’m hoping in the nearby future I can get a video together for you all to be able to show you how I do things exactly. Comment below if you’d be interested in seeing something like that. If you’re interested in following along with my blog you can subscribe below to keep updated on new posts.

Go- To Tuesday

Coffee lovers, raise yours hands! 🙋🏻‍♀️ If you follow me on Instagram, I bet you have a pretty good idea by now that I’m a Dunkin Donut’s iced coffee fan (thanks to my bff, Gabi, who got me hooked on it). Naturally, I had to share with you my go-to coffee order. Lucky for me, I have a Dunkin Donuts right down the street so I have access to this delicious coffee order almost anytime. So here it is:

Large Iced Coffee with French Vanilla Swirl, cream and Splenda

This coffee order is a little sweeter and doesn’t have a super strong coffee taste. The French Vanilla Swirl adds a sweet taste to it that makes you come back for more (which is why I get the large.) It’s a coffee order that has been a crowd pleaser between my friends, family, boyfriend, and more! Not to mention, a large is priced at $2.79, which is a huge discount than its competitor, Starbucks. So give it a try, I have a good feeling it’s going to become a Go-To of yours too. 😉 Leave a comment below if you tried it and let me know what you think!

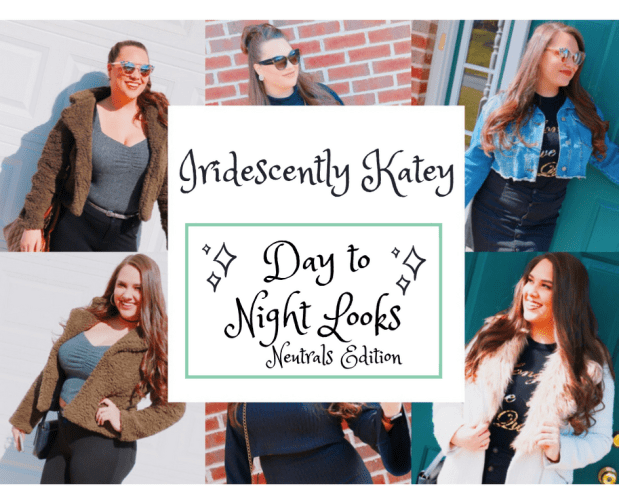
Day to Night Looks- Neutrals Edition

Welcome back y’all,

I recently got some new clothing that I thought, “hmm.. how could I use these all in a future blog post?” Then it hit me, Day to Night Looks! Who doesn’t love an outfit that can simply be used from your early coffee meet up with your besties to date night with your man? I know I do! 💁🏻‍♀️ Scroll below for some ideas to how to turn your look from daytime chic to hot night out.

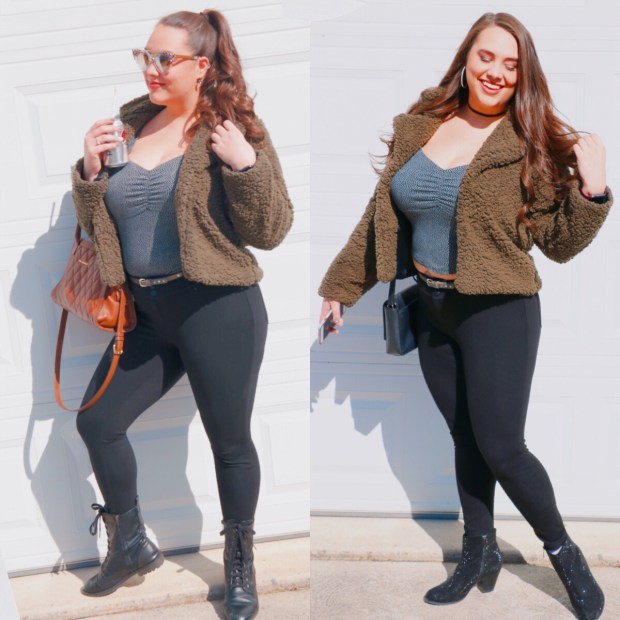
1.) Going shopping (left) to Drinks with the gals (right):

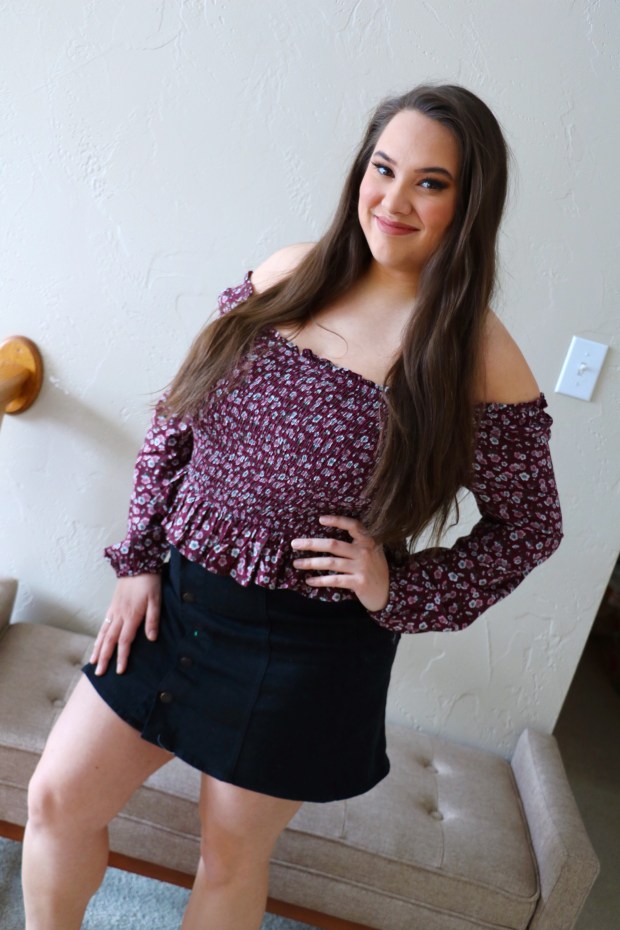
My first look on the left is a comfortable black jegging, cropped puff sleeved patterned top, sherpa jacket, and combat boots. Let’s start with the jeggings, seriously, these are the best! If you are in need of skinny legged dress pants that are plus size, these pants are your new best friend! My sister and I both own a pair and literally wear them all the time. Next, the sherpa jacket is actually on sale right now from Shein (check out this blog about my experience with SHEIN if you’re curious from ordering from there, https://iridescentlykatey.com/2019/02/17/157). This sherpa is actually super warm and cozy, although it is lined inside. I don’t mind it but I figured I’d mention that since you can’t tell from the picture. I love this jacket and thought it was a great purchase from SHEIN. Now to focus on how I changed it to make it day to night:

1.) Shoe change! I went from a simple combat boot to a sparkly heeled bootie. A plain heeled bootie would do the trick too, I’m just all about the bling.

2.) Changing my purse is always a big thing for me for a few reasons. During the day I always need my bigger bag for the essential but when I go out with my gals I hate lugging around a big bag. I switched over from a cute handbag from Vera Bradley to my go-to black cross body from Kate Spade. The purses are both older and neither company makes the exact same purse anymore BUT I did find a cute Kate Spade (I linked it below) that looks pretty similar and works great for a night out. I also linked below a cute tan bag for the day look that will complete a similar look.

3.) Change up your jewelry from simple to sexy. I started with a simple pair Sabika drop studs and changed into silver hoops and a simple black choker.

4.) Simple little hair change from day to night is up to down. I always look at pictures of myself and hate that my hair looks so flat by the end of the night. Starting with your hair up in a ponytail then taking it down and shaking it out before you leave to go out will give your hair the extra volume you were searching for.

Pieces for both looks (Article of clothing is hyperlinked to place where you can purchase exact piece or similar piece):

Pants

Sherpa Jacket

Top

Day look:

Combat Boots

Sunglasses

Earrings

Purse: Not the same bag because I bought mine at the Vera Bradley outlet and it’s discontinued BUT this is adorable and a great price if you want to shop the look for less.

Night look:

Purse: Not exactly the same but close to my current style.

Booties: I bought these booties 3 years ago from Kohl’s and couldn’t find any alike online BUT Kohl’s does have a super cute collection of booties right now and a lot on sale. Check out this link below for a cute pair that would totally work with this outfit.

Hoop Earrings

Choker: I only typically wear the plain and lacy chokers so the ones linked are mainly for the plain but whatever style you prefer would work with this look.

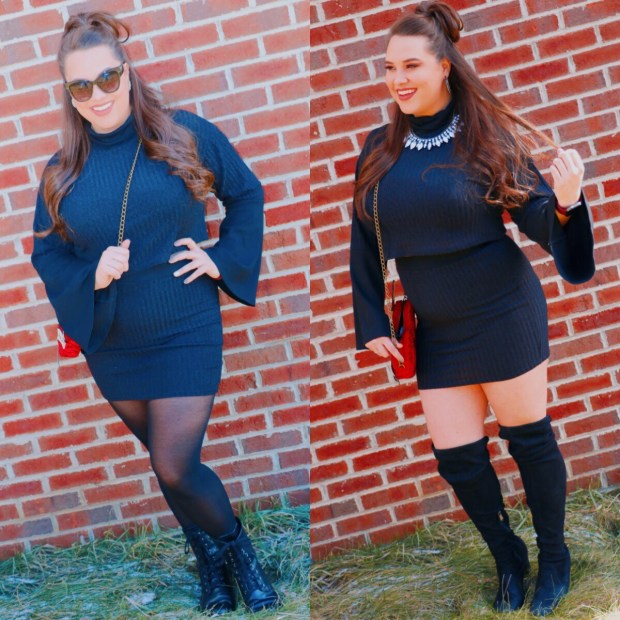
2.) Saturday Morning Brunch (left) to Saturday Date Night (right):

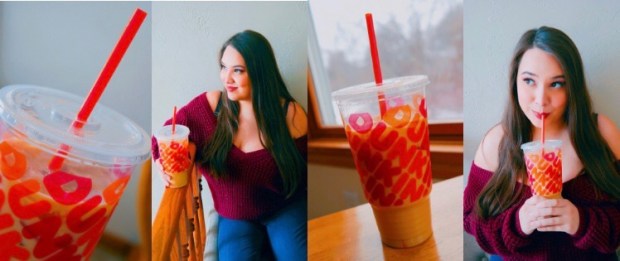
I gotta say, I really love brunch (especially cranberry juice mimosas 🙌🏼)! But ya know what I love more? This set I bought from Shein! It’s super cute, comfy, and I love the sleeves. They are a bell sleeve and in my opinion, they create such a great shape for anyone that’s wearing them. What I love even more about this outfit was it was super simple to change it from day to night and changed from sweet to sexy in just a few steps.

1.) Started the first look with a pair of tights for a sweet and simple look. Then I decided to take the tights off to be able to create a sexier vibe and show a little leg.

2.) Once I removed the tights from the first look, I ditched the combat boots and traded them in for my absolute favorite pair of boots I own. MY THIGH HIGH BOOTS! I ADORE my thigh high boots because not only do they keep my legs warm during the bitter PA winters but they also give my outfits a sexy look, make my legs look longer, and I got them for a great price.

3.) To accessorize this look I stared with these gold statement studs and exchanged them for silver hoops and a statement necklace. I also have this adorable heart shaped purse that is Disney themed with “Fairest of them all” embroidered on it that I paired with this outfit. It actually works great for both day and night and I love the pop of red it gives to this outfit. I definitely would pair a red lip with the night look if that’s your style.

Pieces for both looks:

Two Piece Set: This is an amazing price right now. Don’t miss out of this outfit!

Purse: This is not the same purse since that was a limited edition but I did link a cute and cheap Red Cross body that would pair well with this outfit.

Day look:

Black tights

Combat Boots

Black Cateye Sunglasses

Night look:

Thigh High Heeled Boots

Hoop Earrings

Statement Necklace: It’s not the same one that I’m wearing but I found this from target and it would look great on the black turtleneck.

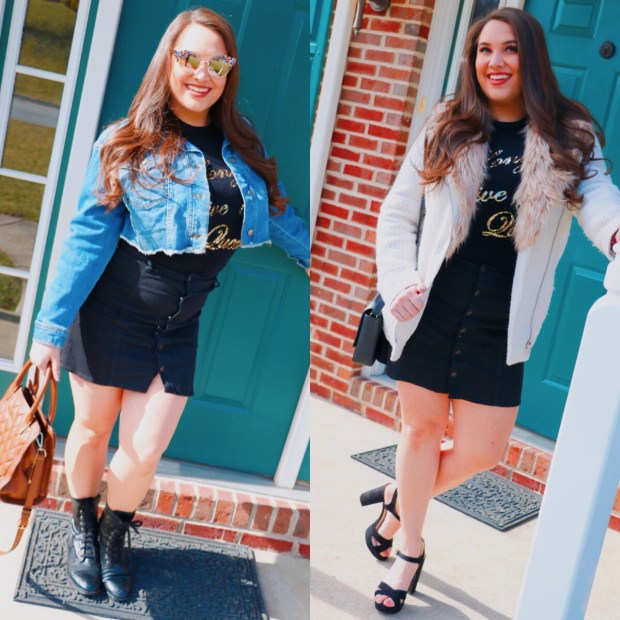
3. Coffee with company to Dinner with Friends

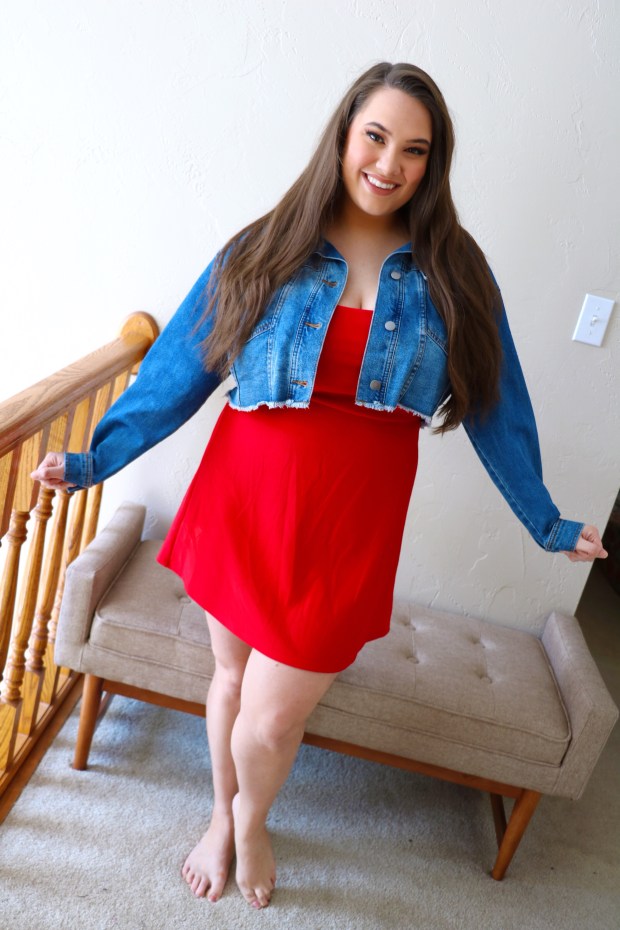
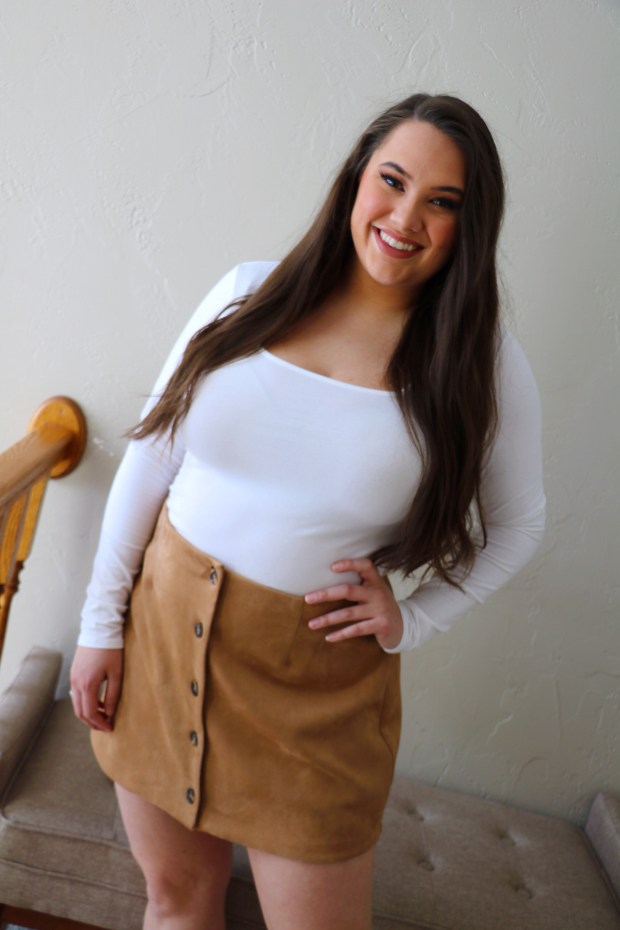
This outfit change was the easiest of the three. How so? Just a swap of the jacket, shoes, and purse helped create a perfect day to night look. This time of year for us we are constantly battling with temperatures. At noon, we have a 50 degree day and by 5 we’re down to the low 30s. That’s a big difference when it comes to outfit planning. I never want to throw on a big jacket during the day but almost always need one by the time the sun is down. This outfit is the perfect fix to that solution. I paired a simple embellished sweater with a button up the front black skirt with two different jackets that can cover the different temperatures. So what’s the difference?

1.) The most obvious change is the two jackets that I mentioned above. Our day look includes an adorable cropped jean jacket. The simple switch would be to switch it out with a dressier jacket that can add a little flair to your outfit. What I love about this jacket I have is that it can make most outfits look dressier than they look by themselves.

2.) The shoe change that we have seen for the last couple looks. Started with a simple combat boot (can you tell they’re a favorite of mine?) and changed into a platform open toe heel that give you a casual dressy feel.

3.) Lastly, the good ole purse exchange. Like I mentioned earlier, I have a love/hate relationship with bigger purses. As much as I love them, they are not my favorite choice to carry when I’m out for the night.

Pieces for both looks:

Skirt

Sweater: Obviously this is not the same sweater but I thought it was closest to what I’m wearing in the photo. My sweater is a forever 21 design that I got for Christmas 3 years ago. I actually did see it on posh mark being resold by someone if it’s something you’re really interested in.

Day look:

Cropped Jean Jacket: Another amazing piece for an even more amazing price. I actually got mine even cheaper than this in the actual store. My fellow bigger busted ladies, this is the Jean jacket of your dreams! Why? When I buy a jean jacket, I have to find one that fits my chest. Therefore, the bottom of it is wider and makes me look bigger than I already am. This jean jacket leaves me the ability to still have a waist, which is a winner for me.

Combat Boots

Tan Purse: Not the same bag because I bought mine at the Vera Bradley outlet and it’s discontinued BUT this is adorable and a great price if you want to shop the look for less.

Sunglasses

Night looks:

Faux Fur Jacket: Not the same one but adorable and a great price.

Heels: These Anne Klein heels are the real deal y’all. You won’t believe how comfy they are! I gotta say I was a little hesitant to buy them cause they were a little pricier but I’m so glad I invested in them. They are worth the price because they are super cute and comfy (which is feel is a rarity in shoes.

Purse: Not exactly the same but close to my current style.

Well that’s it for this edition of Day to Night looks, hope you all enjoyed and would love to know what you’d like to see next. Comment below what you’d like to see me blog about.
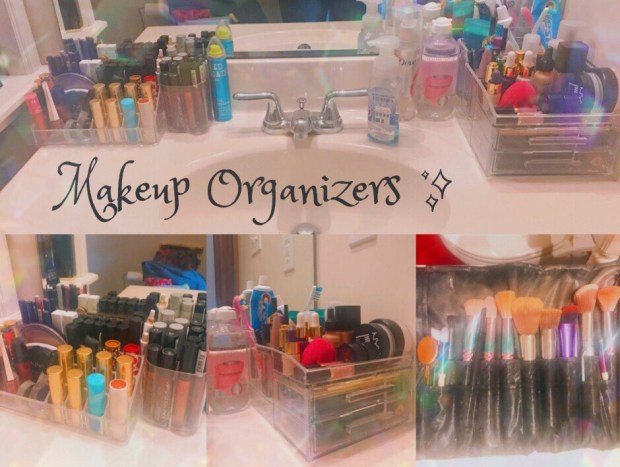
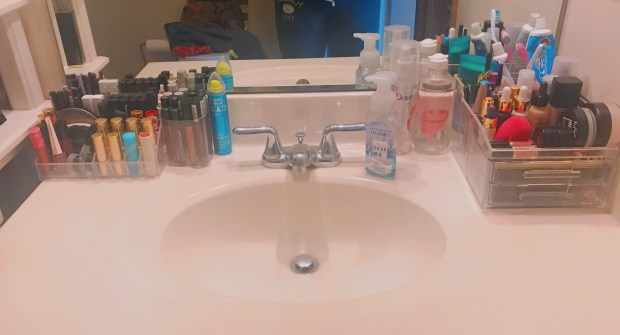