Hello Friends,

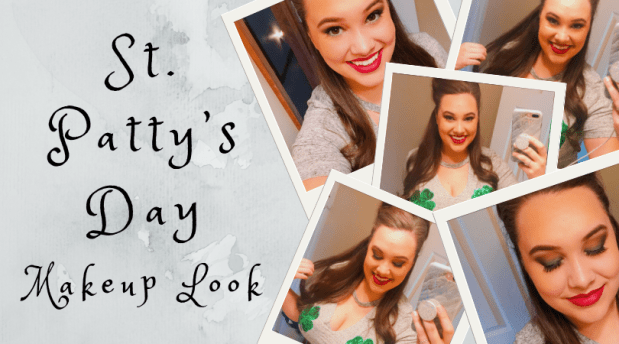
Top of the mornin’ to ya and Happy St. Patrick’s Day! Today’s blog post is something a little festive for this lucky holiday. So if you’re going to the parade, bar hopping, or celebrating with family this look is super cute, easy, and festive for any occasion. So let’s get to it:

When it comes to an eye look with brighter colors, I always like to start with my eyeshadow first. I included the video below to see how I applied the eye makeup exactly. Underneath the video I will have a breakdown with pictures and how to achieve this look from beginning to end.

  1. To start off the look, I always prime my eyes with Urban Decay Primer Potion to help keep the shadow stay intact.
  2. Then I went in with the color Anaheim from the Gwen Stefani Urban Decay palette that I’ve owned for a few years now. The color is comparable to a desert taupe. I applied this color to the crease of my lid. I used a blending brush to help apply the shadow into my crease with a curved sliding motion going side to side.
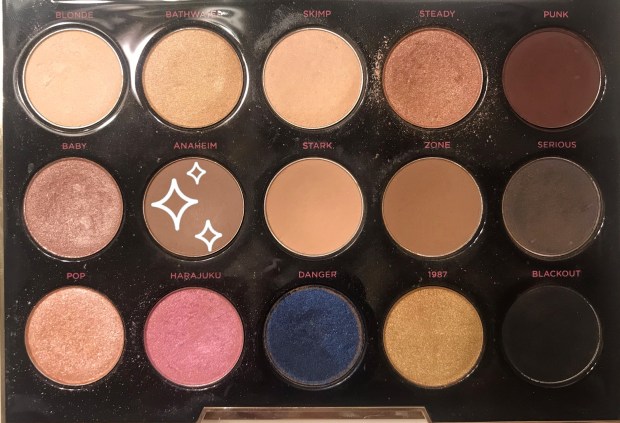
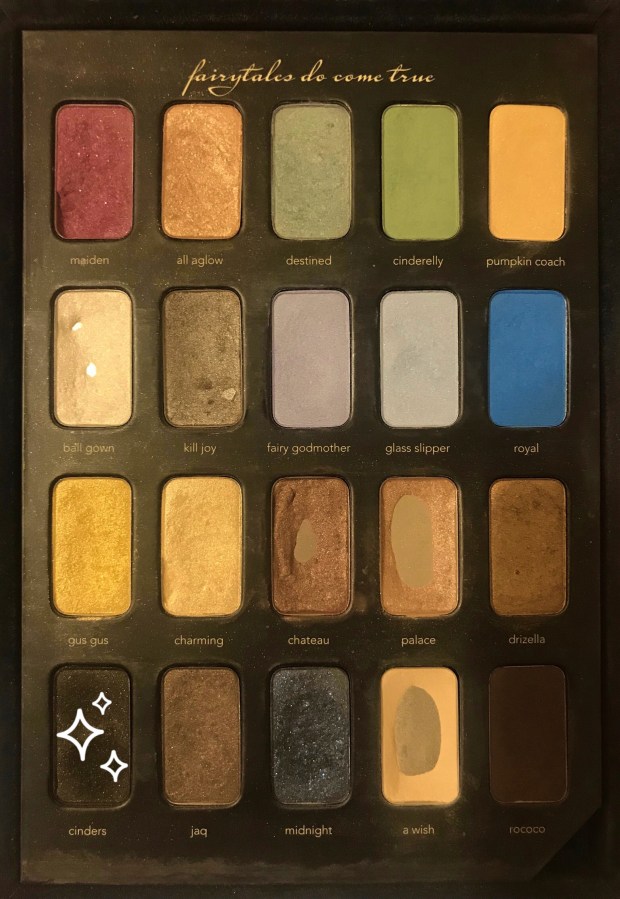
  3. The second color I went in with, the main event, was the bright Kelly Green called fins (from a mermaid palette I’ve also owned for years). This color was the perfect shamrock green that I was looking for (below I’ll attached some palettes that are newer that have comparable colors for this makeup look). I went in with an Eyeshadow brush and dabbed the Kelly Green onto my inner lip to the middle of my eyelid.
  4. Next, I used a black eyeshadow with gold flecks throughout it, called Cinders, for my outer corner. I used another eyeshadow brush to dab this black eyeshadow delicately onto my lid. You must be very gentle with how much product you place onto your brush because a little bit of black always goes a long way. You also need to make sure you blend blend and blend.
  5. After you apply that black eyeshadow, it’s best to go back with the first color we applied (Desert Taupe) and just go over the crease again. This will help blend the black, green, and desert taupe all together.
  6. My last step to my eyeshadow look is the brow bone highlight. I went in with a light shimmer cream color, like Seashell shown below.
  7. Once I finished my eyeshadow color, I grabbed my Green eyeliner (the same green eyeshadow can be used under the eyes if you don’t own liner) and smudged it on my bottom lash line. After that I went in with my NYX Makeup Wonder Pencil on my lower waterline.
  8. Moving onto my top lash line, I grabbed my favorite liner which is the Maybelline Line Stiletto Eyeliner. I created a cat eyed liner for this look.
  9. Moving onto my favorite part, the fake eyelashes by Kiss. I apply these with Ardell Lash Adhesive which has made my process of putting them on so much easier!
  10. Once my eyelook has been accomplished, I follow my basic makeup routine I’ve featured before (Click the hyperlink to be taken to that page). My only difference is I finish it off with Maybelline Super Stay Matte Ink Lip Color in the color Ruler.

And that’s it! Here’s the finished look:

Below, I’ve attached makeup palettes that are available for purchase with the same colors used to achieve this look:

BEST PALETTE TO ACHIEVE THIS WHOLE LOOK!:

Tartiest Pro Remix Palette (Wall Art, Color Explosion, Best Drop, Flow)

Others:

Huda Beauty Obsessions Eyeshadow Palette (Emerald)

Morphe x Jaclyn Hill The Vault Armed & Gorgeous Eyeshadow Palette

I hope you all have a wonderful weekend, the best of luck, and find the pot of gold at the end of the rainbow!

Go-To Tuesday

Anybody else have an obsession with any type of spa mask? Face, lips, under eyes, you name it and I’m obsessed with them. So when I came across this lip mask online I knew I needed it! It’s called Laneige Special Care Lip Sleeping Mask in the flavor Berry. The box instructs you to use the applicator (included in box) to apply all over lips until fully coated. I noticed the more I put on, the better the result. Then you just go to bed and once you wake, you wipe off the excess. And that’s it! I’ve noticed that my lips the next morning are super hydrated and I love the way it makes them feel. If you struggle with dry lips then this is the overnight trick to fix them. It makes them silky smooth and it’s my favorite lip moisturizing product, next to my go-to lip balm. Make sure you check out this product on Sephora (I linked the photo above to take you to the product online).

Hey all,

I have some great products to share with you on this wonderful Friday! I don’t know about you, but I always find myself with 20 tabs open on my internet browser with things I want but don’t need. I think we all have those impulse buy days where we just decide to treat ourselves (I know I do haha). With that being said, I figured I could make a blog post out of it and share with you all my Five Fabulous Finds for this week. So without future ado, here they are:

1.) Meltdown– Currently, my skin has been crappy, so when I came across this product I was instantly intrigued. I think out of this list of my finds this week this is the most essential to me. Not so much of an “I want” product but more like a “I want and kind of need too” type.

2.) Pink Letter Board– Recently, these cute and fun looking boards are all the rage. People use them as decorations for their house, bedroom, events, parties, etc. I think this is so adorable, plus it’s pink, which is my favorite. This is so cute to add to your decor to spice it up a bit, plus it’s customizable! Also guys, it’s super affordable, win-win in my book.

3.) Tarte’s High Tides and Good Vibes Palette– I’m a big tarte lover, if you couldn’t tell by my basic makeup routine. I love their products and this palette is no different. I think this new addition is gorgeous and the pigment from the glitter shadows looks insane! This palette is going to be great for summer with all these vivid colors. Definitely worth a look!

4.) Bath Tub/Bed Tray– So I came across this Instagram blogger from Germany a week ago and she had the cutest picture at the top of her feed. It was her in the bath tub with a tray sitting on top with some of her favorite things. I was intrigued and got stuck scrolling through amazon for a similar tray. Unfortunately, my bath tub can’t support these types of tray (so dream ruined haha) but maybe my future home will have a better bathtub (fingers crossed). With that being said, I came across this tray and thought it would be amazing for me currently because not only is it a bath tub tray but you can also use it on your bed, couch, automan, bench, etc. I thought that was so cool and had to include it on this list.

5.) F87 Edge Kabuki– I know what a lot of you are thinking, what the heck is that? Well for starters, it’s a makeup brush. What else does it do? It applies foundation, concealer, and powder to hard to reach creases. Why do I have it on this list? Great question! I follow two beauty bloggers on Instagram (@exteriorglam & @annalovesyou) and they both highly suggest this brush for “baking” their concealer. I’ve watched them apply their powder with this brush by dabbing it into the powder then dabbing across the undereyes, forehead, and jawline (under contour). Needless to say, they made the process look seamless and it’s been sitting in my browser purgatory ever since.

And that’s it for this week’s edition of Katey’s Five Fabulous Finds on Friday! Let me know in the comments below if you own any of these products, plan to buy any of these, and/or how you feel about them. Thanks for reading all!