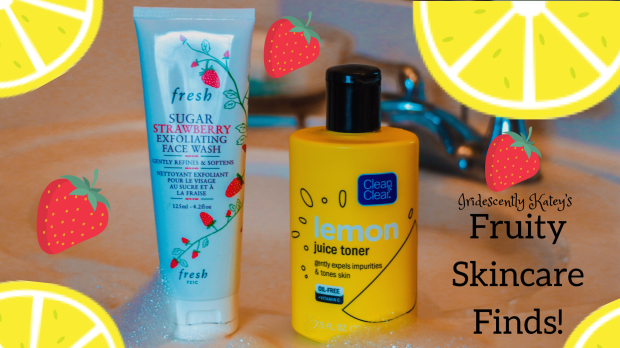
I’ve been testing out a lot of skincare products recently because my skin has been out of control. I’ve been trying prestige and drugstore skincare products and I want to do a special spotlight on these fruity skincare finds. First up:
This face scrub is something I had my eye on all summer. When I finally bought it, I couldn’t wait to try it. The consistency is a gel form with sugar and strawberry looking seeds within it. The scrub is fairly light but feels extremely cleansing. You get a little bit of a tingle to your skin in mis use that feels like the product is doing its job. I feel that Fresh’s scrub has given my skin great improvement and I highly suggest, ESPECIALLY if you love strawberries and the scent like me.
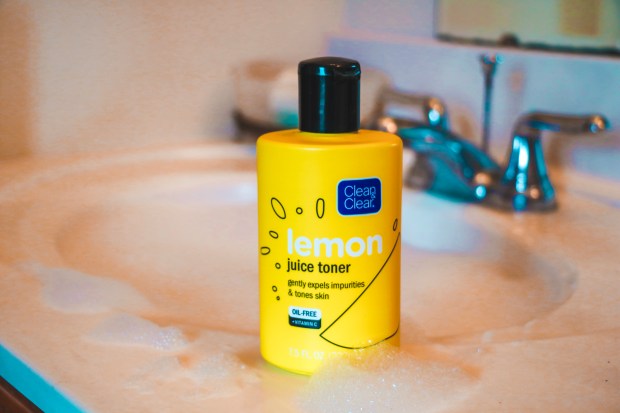
The other fruity themed skincare item is this lemon scented toner. My skincare routine has been lacking a toner for a while and I must say, I’m certainly glad to be back using one again. I LOVE the smell of lemons and using this product is so refreshing and it works wonders. It’s ridiculous how much extra dirt it gets off your face after you remove makeup AND wash it. This product is a must have if you’re in need of a great toner for a low price.
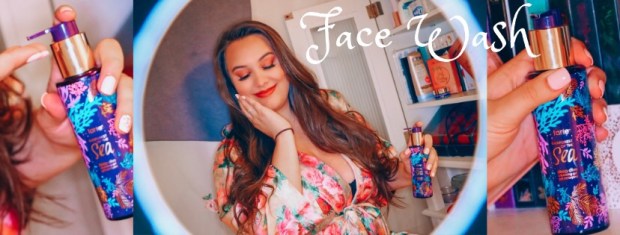
I’m very excited to share with you all my go-to face wash today. Tarte’s Rainforest of the Sea Cleansing Gel has been my favorite face wash for the last 6 months. Since I’ve been using it, none of the others I’ve tried have compared. I’ve tried others while using this (usually samples I’vereceived) and I always find myself reaching forTarte’s again. The CleansingGel comes in a bottle that you pump the product out of. This makes using it very easy and saves you from using too much of the product at once. Usually one pump will be perfect for a full face wash. I have had this current bottle since April and I have only used about half of it. This product retails for $25 but is so forth the price. A lot of times, if you purchase it on Tarte’s website, you can find a discount code online. If you click this link below, it will take you to a link that will give you a 15% off coupon once you enter your email address.
I’ve recently been checking out all these different beauty products that spark my interest but I haven’t committed into buying any of them. So I figured why not make a list for you all (and let’s be honest, for myself, too) of all these super intriguing beauty products. I mean, why not treat ourselves to something that’ll make us feel beautiful and confident now and then? So scroll down and check out My Beauty Wish List for Summer 2019. (And feel free to send me any of these if you’re feeling generous! 😜 hahah). Anyway, the wish list awaits…
Jovia’s Place I Am Magic Foundation: This Foundation had been tested by makeup gurus such as Nikki tutorials and Jeffree Star and they were both obsessed. So needless to say, I’m in desperate need of this foundation. Best part? They said for as high quality this Matte Foundation is, the price point is incredible. Price: $20
Beauty Bakerie Matte Lip Whip (Salted Caramel Mocha): I’ve been dying to try this lip product for a few weeks now. I’ve had my reservations from it because of not ever using products from this company. But this color looks stunning and I always how the lip product looks in photos. Price: $20
Yes to Cucumbers Cooling Hydrating Primer Stick: One of my favorite Instagram beauty gurus, @annalovesu, featured this primer on her videos recently. She said that this is her newest favorite primer and I’m so intrigued by it. Best part about this is the price point! Price: $9.99
Huda Beauty Resting Boss Face Waterproof Setting Spray: Setting spray? Really? Haha yes really! This Setting spray was specifically designed to be almost like hairspray (which is what drag queens use to keep their makeup in tack.) PLUS, it’s waterproof and this girl needs all the helps she can get when it comes to the hot summer months!
Sol de Janeiro Brazilian Bum Bum Cream: Who doesn’t want a cream that’s supposed to tighten up your bum and help with cellulite!? I know that I was all about it after reading what it was designed to do. Whose ready to give it a spin for some nice tight cheeks!? 😜 Price: $45
Dose of Colors Matte Liquid Lipstick (Warm & Fuzzy): These lipsticks always look so pigmented when being worn and the colors are so rich! Dose of Colors have definitely intrigued me with their liquid lips and I NEED to try! Price: $18
Verb Sea Texture Spray: I’ve seen a couple bloggers rave about this texture spray and I wanted to get my hands on this ever since. These girls said that it gave their hair the exact texture they were in need of in a few sprays. What’s a better time to have a Sea like texture to my hair then summer? Price: $16
Huda Beauty Not Your Mama’s Panty Hose All Over Body Highlighter: Glow all over? Sign me up!!! 🙌🏼 I don’t think this needs to much introduction more than that. Huda knows what she’s doing when it comes to makeup and I always am dazzled with her makeup. I take one of each please. 😉 Price: $49
Estée Lauder Double Wear Stay-in-Place Foundation: Many have said that this is the holy grail of foundation and now I NEED to try. Who can hate on a foundation that’s basically a real life filter? I’m ready for my close up Mr. DeMille! Price: $42
So as you can see, I’ve been eyeing up TONS of beauty products (you’re welcome for torturing you with all new products to want and try. 😋) What’s your most recent beauty product that you’ve been pining over? Share below!
Welcome or welcome back, I’m really excited to share this new post with you all. This is my Full beginner makeup look under $60. I decided to do this because I know a lot of people that have no idea where to even begin when it comes to makeup. Therefore, why not make a starter place for those of you that have no idea what you’re doing. This post can also be for those of you that are in need of a new foundation, mascara, blush, or maybe even just a cheaper option on those days you’re just running to the store and don’t want to put your more expensive makeup on. Now for some of you, $60 may seem like a lot to spend on makeup but it’s actually not very easy to buy a full face of makeup for that. You can easily spend $100 or more on products that will give you close to that full face of makeup look but not even completely. I did the hard work for you and found products that I love and would be best for beginners to use. Follow along as I list the products I used and how to achieve this look (featured above) for under $60!
Foundation- Wet n Wild photofocus Foundation (I used the color soft beige and Wal-Mart, CVS, and Walgreens all have this foundation if you need to find a match in color.) ($4.69)
Highlight & Contour- Hard Candy Look Pro! Highlight & Contour Face Duo Stick (if you’ve ever heard of bronzing your face and highlighting with concealer, this stick will do both for you! I love it because it’s an all in one.) ($6.00)
Blush- NYX Ombré Blush in Nude to Me (This blush looks amazing on tan skin so I figured this would be perfect to feature since summer is here!)
Mascara- Tarte Travel Size Lights, Camera, Lashes 4-in-one Mascara (Yes, $12 is expensive for a travel sized mascara but I’ve really been obsessed with this one lately so I have you one splurge item. It’ll be worth it, I promise it! If you’re not about it, Maybelline Lash Sensational would be my next pick. (Tarte- $12, Maybelline- $5.39)
Lipstick- Maybelline SuperStay Matte Ink in Seductress (This Lipstick is, by far, the longest lasting lipstick I’ve ever worn. It’s amazing! I’ve told my friends about it and they’ve fallen in love too. It’s got this amazing texture that when it’s on your lips, you can barely feel it, and when you look in the mirror you’re finally reminded you still have lipstick on. That’s the best kind of lipstick in my opinion.) ($6.64)
Start with making sure that your face is clean and moisturizer. Since we are not using a primer, we need to make sure that our face has a base before we put our foundation on.
Now that we moisturized, it’s time to put on the foundation! Wet n Wild’s photofocus Foundation had a wand attached to it that I use to place the product onto my face.
Grab your Ecotools Total Perfecting Blending makeup sponge and turn your water on in your sink. Place your sponge under the water and squeeze it so it absorbs water. Then remove the sponge from the water and squeeze the excess water from it. You want your sponge damp but don’t want extra water in it.
Now we can use that makeup sponge to blend in our foundation that we placed on our face. Use a light bouncing motion to blend the foundation in. Make sure you are blending it in all over your face, ears, and down your neck. We want the product to match all surrounding areas so it doesn’t look like we have multiple skin tones.
Once you have finished blending in your foundation, grab your Hard Candy Look Pro! Highlight and Contour Face Duo Stick and use the lighter side first. Apply this to your under eyes, bridge of your nose, then moving up to your forehead and feathering it out. Then take the other end (the darker part) and apply this to your jawline, the space under your cheekbone, and on the outside of your forehead. Once you’ve applied your highlight and contour to your face, grab that makeup sponge and blend in that makeup.
Grab your Airspun Translucent Loose Powder and dip your makeup sponge into powder. Place the powder under your eyes, under your contour (the spot between your jawline and space below your cheekbone. Also place the powder in between your eyebrows where we placed the highlight earlier. I like to also go over my face and apply the powder to the places that feel tacky. The reason we are placing the powder is to set this makeup for long lasting wear. We are gonna keep this powder on our face for a little and come back to it.
While we let our makeup set with the translucent powder, let’s grab our NYX Micro Brow Pencil and outline our brows. I like to start with the top and use a fairly light hand, especially if this is your first time. Once you’ve outlined the top and bottom brows, start on the inside of your brows and start to lightly feather your strokes so they match the hairs in the center of your brows. As you work your way towards the center of your brows we can start to darker the color a little. Continue coloring in until you have acquired your desired brow.
Now we are grabbing the NYX Lid Lingerie Eye Tint and applying this to our lids. Use your desired amount and blend with your fingertip. Try to not apply this too far up your lid, just slightly higher than your crease.
Remember that powder we placed all over? Well grab that e.l.f. Blush Brush because we are about to brush that all away. Go back to that excess powder and brush it off your face.
Grab that NYX Ombré Blush And use the e.l.f. Blush Brush to dip it in the product. Take the brush and apply the blush to the apple of your cheeks and up towards your high cheekbones.
I promise we are ALMOST done, Just two more steps! Now grab your Tarte Travel Size Lights, Camera, Lashes 4-in-1 Mascara and apply this to your eyelashes. I like to apply my mascara with a rolling motion going up to help curl the lashes as I’m applying the product.Last but not least, grab your Maybelline SuperStay Matte Ink apply this lipstick to your lips. Try to make sure that you start at your Cupid’s bow and make your way out.
**Below I’m going to feature more products that I feel will help this process go smoother or help. You don’t need these, but they will help. These products exceed the $60 limit but I figured I’d include them in case you’re interested.
***If any of these steps don’t make sense, check out my video below for an idea of how to do them.
And that’s a wrap. Let me know what your think of this video and if it has helped you or not. I’m more than willing to do more videos like this with suggestions. Let me know with comments below or on Instagram.
Welcome back friends or if you’re new, welcome! Today, I’ve decided to share with you all my skincare routine. Since there are multiple times you take care of your skin during the day, I decided to break it down in different blogs. This edition will be focused directly to my night time routine. I do not have perfect skin by any means (especially during my time of the month) so you will definitely see some blemishes in my video. But no one is perfect and I’m working on a better version of myself every day. So join me on achieving better skin for ourselves! I’ve been lucky enough to find products that I’ve been loving recently and it’s been making me want to commit to my skincare routine more frequently. I’m so excited to share with you some of these products because they make my skin feel so amazing afterwards. So, let’s get to it!
Video:
Product Breakdown:
(Photos are the links to the products)
Step 1- Grab a headband, whether it’s a terry cloth spa headband or just a casual plastic one. This is totally optional but I do it because I hate having wet hair around my face.
Step 2- *if wearing makeup* Grab your makeup wipe and wipe off all excess. Don’t scrub at the places that don’t wipe off easily, we’ll handle those places in our next step.
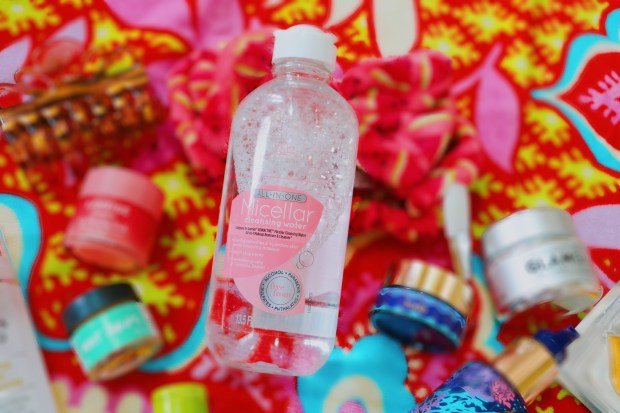
Step 3- Grab your Micellar Cleansing Water and pour some into your cotton pad. Then wipe excess makeup residue and those harder to get makeup areas (mascara/eyes, long lasting lipstick, etc) off. If you’re not wearing makeup, this cleansing water clears the face of all impurities before washing it. I’m going to link the one I used in the video to the photo above and the other option here. I’m also going to link another one that can be found at Walmart, Walgreens, Target, etc. They both do the same thing and I like either one.
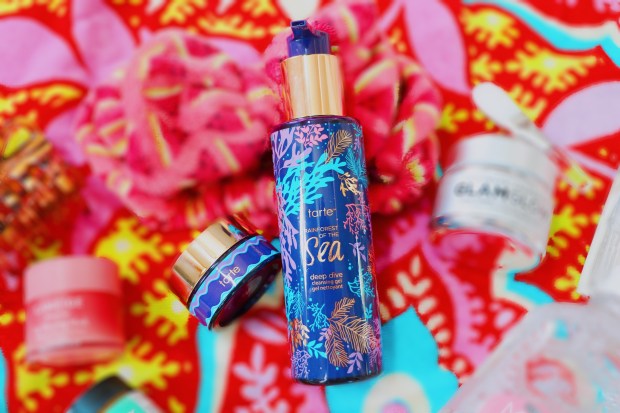
Step 4- I grabbed my rubber face scrubber (I’ll link here) and applied the Tarte Rainforest of the Sea Deep Dive Face Cleanser. Once I’ve finished, I rinse my face off and pat dry.
Step 5- Then I grab my Tarte Rainforest of the Sea Drink of H2O Hydrating boost. I dab a penny size of product onto my finger and distribute it over my entire face. Make sure that you use your fingertips to gently blend the product into your skin.
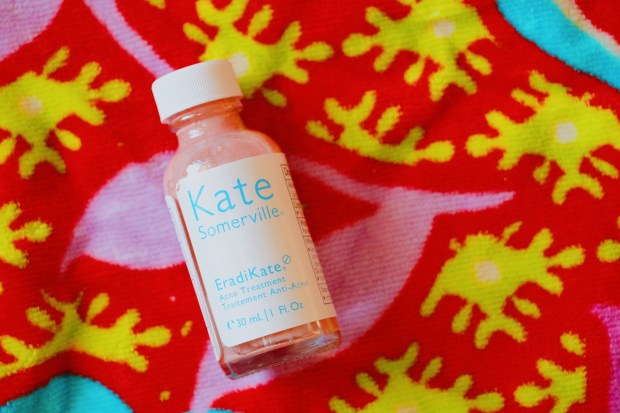
Step 6- I finish off my night time routine with this new product I’ve started using recently. It’s the Kate Somerville EradiKate Acne Treatment which helps with pop up blemishes. I’m curious to see how well it works and will definitely let you all know my results with it in the future.
And it’s that simple. This whole routine takes about 10 minutes max! Stay tuned for my morning skincare routine and my favorite masks and more coming up soon in future blog posts. Let me know what you’d like to see if the comments below. Until next time,
When applying our makeup, it is so important to have the right tools to pull the whole look together. Makeup brushes may seem like your last priority to buy but when it comes to a brush like this, it’s worth the buy. That’s why I use the Sigma F8 Flat Kabuki Foundation brush. This brush leaves an amazing finish to my foundation. It’sspreads it very easily and itdoesn’t absorb a ton of the product. Before I used this brush, I always felt like my foundation was just absorbed into sponges and brush and I never got the full amount onmy face. This brush distributes the amount of foundation that I intend for my face. The flat top to this kabuki also insured that the foundation isn’tstreaky when applied. This brush is about $25 and definitely worth the price. If you purchaseon the site for the first time you can receive a discount code, which is what I did when I first purchased it. Try this brush out, trust me, you’ll be hooked!
Today I’m excited to finally share with you this look. I’d like to think of it as a subtle glam makeup look! Who doesn’t love to try and be glam in any situation? Well this look will help you create it in a subtle and gorgeous way. Follow along below on the products I used and a step by step on how to create this look. Follow along with the video if you get stumped on any of the steps. Trust me, if I can do this, anyone can! 😁 let’s get to it:
Next we grab our Creaseless concealer (33N Medium) and apply it to all the places you want to highlight on your face. Check out my video if you’re not quite sure exactly where to place your concealer. After that you want to grab your Hard Candy Highlight and Contour stick (Medium- you can also use this highlighter if you don’t have a concealer that is lighter that your foundation) and apply to the places you want to contour. Again, I have included a video above that will show you places that many people tend to place their highlight and contour. Do what works best for your face! Once you’ve placed that in your desired areas, take your beauty blender and blend those into your foundation.
Next I grab my Covergirl Professional Loose Powder (Light Translucent) and dip my beauty blender into it. I then “bake” my face by applying the powder on the places that I highlighted my face with the concealer. Typically, your concealer is sticky and tacky so the loose powder helps set the product for a long days wear. Tip: if you can see the powder on your face, you’re doing it correctly. Don’t blend into your face… yet! We’ll get there, just let the face “bake”, hah get it now?
While I wait for that to dry and set, I grab my NYX Micro Brow Pencil (Brunette) and outline my eyebrows very lightly (watch video to see how I did it exactly). After I use the Pencil, I grab my Busy Gal Brow Tint (brunette) and fill in my brows with this product. To finish off my brows, I grab the Ardell Brow Sculpting Gel and apply this onto to my brows to even out the product/set it.
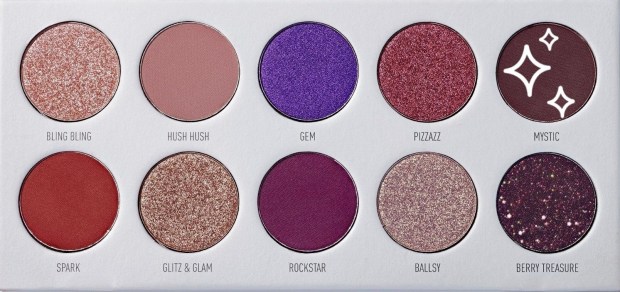
Now here comes the fun part, eyeshadow! Grab your Bling Boss Eyeshadow Palette and dip your fluffy brush into “Hush Hush” and blend it into your crease.
Next dip a more dense brush into “Mystic” and lightly apply this to your outer corners. BLEND WELL!
After that, dip another brush into “Ballsy” and apply to your inner corner out towards your last color application. Blend those colors together.
Last, dip your finger into “Bling Bling” and apply this color to your brow bone. This helps give a little pop of shimmer to your brow area.
After eyeshadow application is finished, go back with a fluffy brush and brush off that excess loose powder that we were “baking” with.
Now, onto those luscious lashes ladies! Grab your House of Lashes Siren Falsies (or any pair your have laying around) and use your Ardell Lash Adhesive to apply to your lashes. While letting your lashes dry and set, grab you Morphe Color Pencil Eyeliner (Dark Room) and apply on lash line. Then take your NYX Wonder Pencil (Light) and place on your waterline.
This is the perfect time to apply blush and highlighter (which I didn’t feature in this video). I have a blush and highlighter palette that is quite similar to this Lorac one (I would use Blossom on cheeks & Opalescent as a highlighter).
Last but not least, what fun is doing your makeup and getting all dolled up without lipstick? Grab your Wet n Wild Megalast Liquid Catsuit Lipstick (Berry Recognize) and apply this gorgeous color to your lips. FYI: my dancers use this color for their dance competitions and the color looks amazing on every skin tone! I highly recommend this product if you’re looking for a great vibrant color that isn’t a red.
And that’s it! This look usually takes me about 35/40 minutes to accomplish this fully look, which may seem like a lot of time to some people. I think it depends on your pacing and allotted time but it could probably be done in a half hour. If any of these steps are new to you they may take a little longer to do at first. Thank you so much for following along though. I’ve had a lot of fun creating this video for your all and hope you enjoy. Let me know if there’s any specific palettes you’d like to see tutorials with or certain products that you’d like to see me use next!
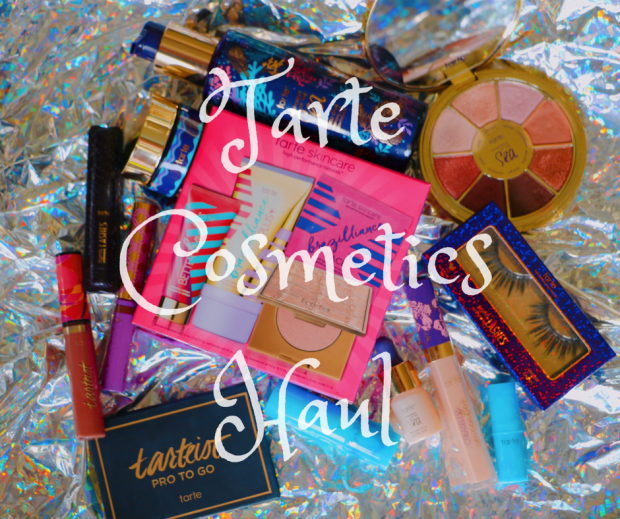
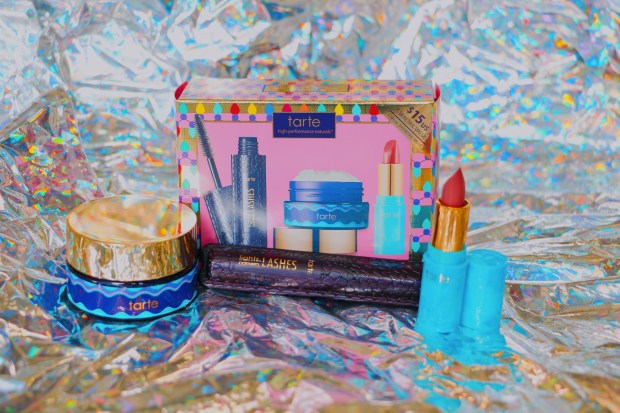
Today I’m excited to share with you my recent haul/favorites from one of my favorite makeup lines, Tarte Cosmetics! Tarte has been one of those companies that has been growing on me the last couple of years. I know that Tarte has gotten a bad wrap from famous makeup gurus and such in the past but I have to say that I personally love them. Recently they just finished up a sale (which is when I do most of my shopping from them) and I bought a couple of new products & some I needed refills of. Before I share with you all my recent purchases and my favorite products I use by them, I wanted to share why I use their personal website to order their products.
For starters, multiple retailers sell Tarte Cosmetics including Ulta and Sephora. You may be asking, why doesn’t she just order it from there? Well, I’ll tell ya why. Tarte Cosmetics has this really awesome point system on their personal website (tartecosmetics.com) that gives you points just for signing up for their system, browsing their website, creating a profile, following their social media accounts, buying products, and more! Rewards include percentages off purchases, money off purchases (up to $20), Tarte specialty gifts, and also makeup. It may not seem that exciting to you but it only cost 800 points to receive $10 off a purchase which is really awesome. I loved that these points gave such an exclusive coupon that saved me a nice chunk of change. Depending on how much you spend will determine the amount of points you’ll receive. I’ve noticed that the majority of the points given out after purchases have been anywhere from 25-150. With these points, it’s not super difficult to get to the better prizes available. You only need to make a few purchases before you’re ready to use those points on some good coupons or free makeup.
Not only is the point system make it all worth it, the sales that frequent on the site are a big selling point to me as well. Sephora rarely has sales and Ulta usually only includes prestige items in their sales for a very limited time. Tarte Cosmetics website pretty frequently has sales going on and cool promos for their customers. When there isn’t a sale currently going on, I also figured out a way to get a percentage off a purchase. As long as you have an account and are logged in, I usually placed multiple products in my cart on my safari and leave it there for a day or two. In two days, my email will have a coupon code for 15% off to go and buy those products that are still in my cart. So if there isn’t a sale going on, that’s a good trick to keep up your sleeve. I also have a link that I’ll leave right here that will also give you 15% off your purchase (this one you won’t have to wait around for 😉).
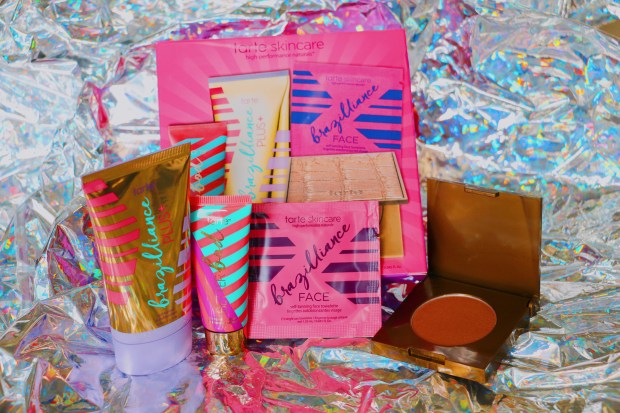
Tartiest Pro Eyelashes in LCL (I’ve been eyeing these lashes up for a while and I have to say that they did not disappoint! They are exactly what I was looking for: full, long, and dramatic.)Deep Dive Cleansing Gel (This face wash is one of the products I needed refilled. I bought the travel sized version in a gift set this Christmas and I’ve been hooked ever since. I tried to use in sparingly until another sale came along so I jumped at the chance to purchase this during this last recent sale. It is a little pricey for a face wash in my opinion but I love the feeling it gives my face so it was worth it to me.)Girl Boss Goodies Skin & Color Set (I gotta be honest, this set was a tad random to me. (Haha) Why did I get it then? Well for starters, in the gift set I got for Christmas this moisturizer was in it and I loved it. So to be able to get it for $12 plus two extra makeup products I thought that was a steal. Second, I was in need of mascara and I see people raving about this mascara all the time. I figured I would see what all the hype was about and I have to say I’m pretty impressed so far. Lastly, this lip color looked really pretty from the pictures. The lipstick is a mini version and a tad flimsy but overall I like the product.)Girls Just Wanna Have Sun Bronze & Sun Set (I’ve been all about the bronzing products recently because I’m super pasty. 😂 I need some color added to my body before the sun fully decides to grace us with her presences. Besides, this gift box is on sale for $12 so I thought that was also a steal!)
My Other Tarte Favorites:
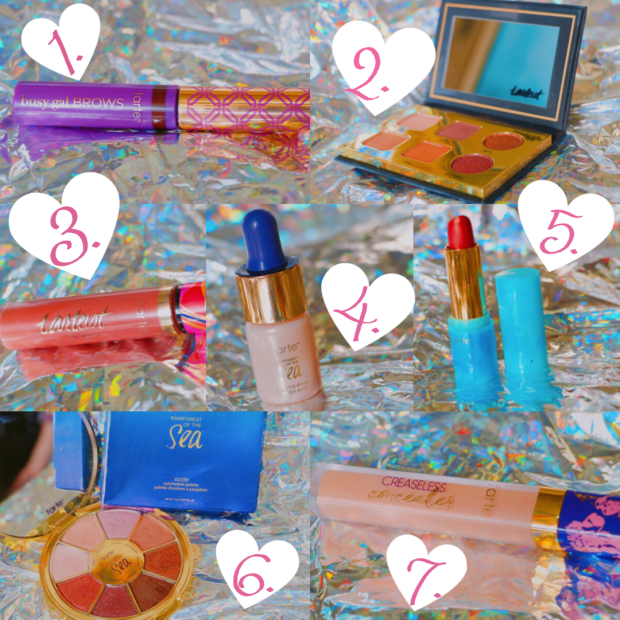
1. Busy Gal Brows in Medium Brown (This product is amazing because it’s super easy to apply and only take 5 seconds each eyebrow. It’s truly the busy gals perfect brow product!)
4. Rainforest of the Sea Radiance Drops (Not only is this great for creating a dewy look under your mascara but you can also use this as a highlighter.)
6. Rainforest of the Sea Sizzle Eyeshadow Palette (The best thing about this eyeshadow palette is the pigment is super blend-able and it’s suggested that you apply the product with your fingers for the best result. It’s makes it super easy to use for a makeup lover at any level.)
I used all the products from Tarte Cosmetics that I featured above to create this makeup look in this photo.
Following along step by step to create this look:
Starting with the foundation that you’ve already applied, grab your Creaseless Concealer and apply it to your under eyes, bridge of your nose, and in-between your eyebrows feathering up towards your forehead. Blend that into your foundation.
Next, grab your bronzer that came with your Girls Just Wanna Have Sun Set. Apply the bronzer in the area below your cheekbone (the hollow area) from inner ear to area below the center of your eye. You want that line your creating with the bronzer to aim towards your mouth in a downward diagonal .
Make sure your use your setting powder to set your foundation and concealer before moving onto the next step.
Moving onto your brows, grab your Busy Gal Brows and brush it over your eyebrows.
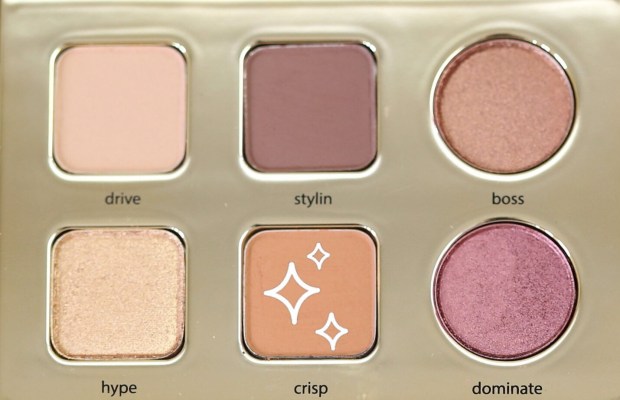
Now grab your Pro To Go Palette and dip your brush into the color ‘crisp’. Place this color into the crease of your eye and buff it in until it’s blended well.
Once you’ve blended ‘Crisp’ in your crease, pull out your Sizzle Palette and apply the color ‘high tide’ to your mid mid to outer corner. Then dip your next finger into ‘kite surf’ and fill in that color from your inner to mid mid. Lastly, dip your finger into ‘playa’ and place it on your brow bone. If you want to place a little bit of sparkle on your brow bone you can dip your finger back into ‘kite surf’ and swipe that below the brow.
Once your eyeshadow is applied, make sure you go back with your fluffy powder brush and brush off that excess powder. Then grab your blush and apply that to the apples of your cheeks.
If you’re an eyeliner type of gal, apply your eyeliner and then grab your mascara included in your Girl Boss Goodies Set. Apply the Lights, Camera, Lashes Mascara to your lashes below you apply your fake lashes.
It’s FALSIES time!! Grab your Lights, Camera, Lashes Falsies and apply these beauties to your lash line.
Once your lashes are on, there is only one more step for us to take and that is lipstick. Grab your Tartiest Quick Dry Matte Lip Paint in ‘Bestie’ and apply that to your lips first. Once dry, go in with your Color Splash Lipstick in ‘Pink Sands’ and put that over top the matte lip paint. I like to apply it overtop because the color pops over the matte nude.
And just like that, you created a fabulous Tarte makeup look! Have fun creating your own looks with all the different colors these palettes and sets include. I bet you’ll love what Tarte has to offer!
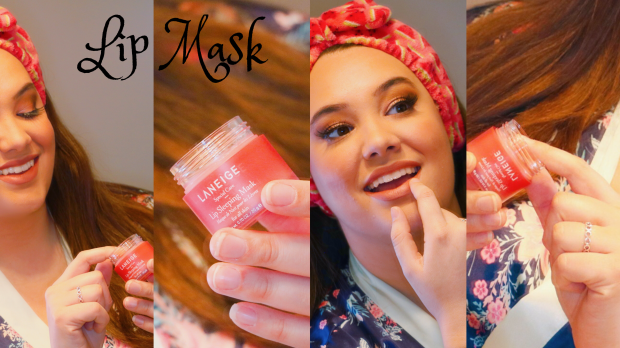
Anybody else have an obsession with any type of spa mask? Face, lips, under eyes, you name it and I’m obsessed with them. So when I came across this lip mask online I knew I needed it! It’s called Laneige Special Care Lip Sleeping Mask in the flavor Berry. The box instructs you to use the applicator (included in box) to apply all over lips until fully coated. I noticed the more I put on, the better the result. Then you just go to bed and once you wake, you wipe off the excess. And that’s it! I’ve noticed that my lips the next morning are super hydrated and I love the way it makes them feel. If you struggle with dry lips then this is the overnight trick to fix them. It makes them silky smooth and it’s my favorite lip moisturizing product, next to my go-to lip balm. Make sure you check out this product on Sephora (I linked the photo above to take you to the product online).